If your blues or classic rock progressions feel shaky, the likely culprit is the dominant seventh built on B. It’s the V chord in the key of E and it shows up everywhere—from 12-bar shuffles to country turnarounds and jazz standards. In this guide, we’ll turn that stumbling block into a strength with a focused, realistic practice routine. We’ll talk shapes, hand mechanics, voice-leading, and drills you can work into your next practice session. And yes, when I say the classic bluesy chord, I mean B7—now let’s learn to play it well without fighting your hands.
Why this chord matters more than you think
In the key of E, the V7 chord wants to pull back home to E. That tension-release feeling is the backbone of countless songs. If the chord is buzzy, late, or out of tune, your entire progression loses momentum. Nail this shape and you’ll notice three immediate benefits:
- Cleaner V–I resolutions in blues and rock progressions.
- More confident turnarounds and endings.
- Stronger transitions to E major and E7 (no hiccups at bar lines).
The two shapes that matter
You don’t need a dozen voicings to sound great. Get these two under control first:
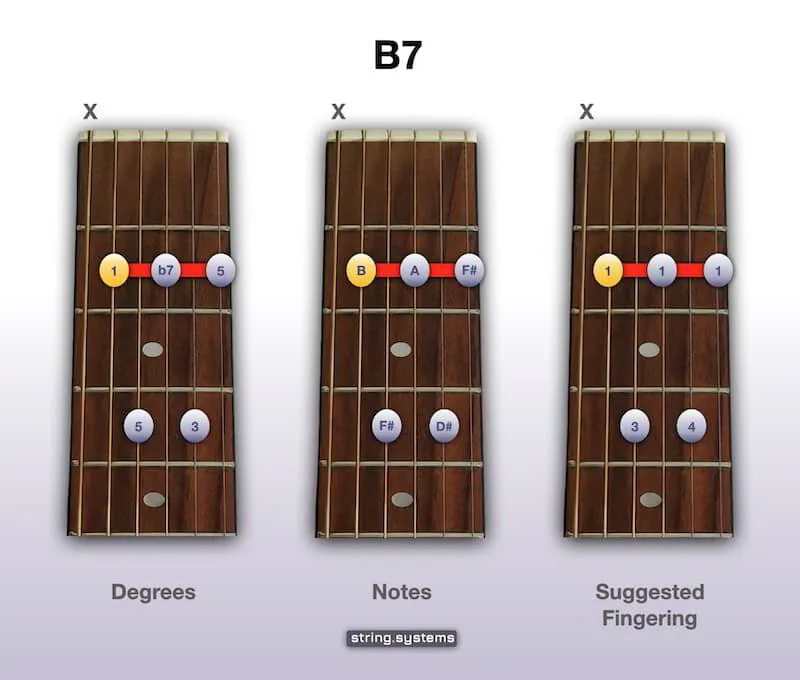
1) The open-position grip (the workhorse)
This is the classic beginner-friendly shape with a rich, gritty character. It uses a combination of open strings and fretted notes, which gives it chime and bite. Focus points:
- Keep the fretting fingertips vertical; avoid collapsing knuckles, which mute adjacent strings.
- Angle the wrist slightly forward so your ring finger doesn’t touch the first string.
- Strum only strings 5 through 1; leave the low sixth string out unless you intentionally want the heavy sound.
2) The movable 5th-string root shape
When you need a tighter, punchier sound for rock, funk, or R&B, switch to a 5th-string–root dominant seventh. Place your root on the 5th string at the 2nd fret (for B), then build an A-shaped dominant 7 voicing. This version excels for rhythm parts and quick stabs because it’s compact and easy to mute.
A three-part technique fix that solves 90% of problems
- Thumb placement: Put the thumb pad roughly behind the 2nd fret on the neck’s centerline. If the thumb creeps over the top, your ring and pinky lose reach and strength. For open position, a slightly higher thumb is fine; for the movable shape, keep it lower to enable a clean partial barre if needed.
- String-by-string accuracy: Arpeggiate the chord slowly. Listen for scratchy notes and isolate the finger causing trouble. Fixing one muted string at a time is faster than mindlessly repeating the full grip.
- Roll–release muting: For rhythm playing, release pressure the instant a strum ends while keeping the fingers touching the strings. This stops ringing and tightens the groove. Practice down–up–mute on a loop to build the reflex.
The 14-day plan (10 minutes a day)
This is short on purpose. You’ll get more from 10 focused minutes than from 40 distracted ones.
Days 1–3: Perfect the open position
- Arpeggiate slowly: 5–4–3–2–1, then 1–2–3–4–5. Full ring on each note or fix the finger that’s choking it.
- Micro-timing: Strum four downstrokes per bar at 60 BPM. Record yourself and check for even dynamics.
- Test transitions: Switch between E major and the V7 chord for four bars each without breaking time.
Days 4–6: Add the movable shape
- Fret the 5th-string–root voicing at the 2nd fret. Strum only strings 5–2 to keep it tight.
- Practice a two-bar groove at 70–80 BPM: down–down–up (rest) up–down–up. Keep it light.
- Connect open to movable: one bar open, one bar movable, back and forth without tempo loss.
Days 7–9: Transition speed and accuracy
- Play E (two bars) to the V chord (two bars) and back. Add a quick stop: mute on beat 4 of the last bar.
- Introduce a hammer-on in the top notes to give the chord a vocal quality.
- Target the guide tones: aim your ear to the 3rd and flat 7th. Those two notes define the sound.
Days 10–12: Groove upgrade
- Swing feel: Set a metronome to 60 BPM and subdivide triplets. Strum on 1 and the “a” of 2 and 4.
- Palm muting: Rest the picking hand lightly near the bridge for percussive, short chords.
- Accent discipline: Accentuate beats 2 and 4. The chord should pop on the backbeat, not on every strum.
Days 13–14: Real-song integration
- Build a 12-bar in E: four bars of E, two of A, two of E, one of the V chord, one of A, one of E, one of the V chord. Record it.
- Switch voicings by section: open in the first chorus, movable in the second for contrast.
- Finish with a turnaround: two-beat stabs on the V chord before resolving to E on beat 1.
Two-minute video drill
Work this quick drill into warm-ups. Follow along with alternating open and movable shapes, then add muting and accents.
Voice-leading: the hidden shortcut to cleaner changes
Think less about grabbing the whole grip and more about how a couple of notes move. The 3rd of the V7 wants to resolve down to the root of E; the flat 7th wants to fall to the 3rd of E. If you lead with those two notes when you switch, your hand naturally lands the rest of the chord in time. Try this: pluck the inner two strings first as you change, then strum the full shape on beat 2. It sounds intentional and buys you an extra fraction of a second—often all you need.
Common mistakes and quick fixes
- Problem: The high string is dead. Fix: Rotate the fretting hand so your ring finger points slightly toward the headstock; it lifts off the first string.
- Problem: The low sixth string rings by accident. Fix: Use the tip of your fretting hand index or the pad of your picking hand palm to mute it.
- Problem: Buzzing when you strum harder. Fix: Press closer to the fret wire, not harder overall. Increase pressure on the notes that buzz instead of clamping the whole chord.
- Problem: Late changes. Fix: Change on the “and” of 4. Strum the previous chord, then silently lift and land early so the new chord hits on 1.
Gear tweaks that help
- Strings: If the chord feels stiff, try a lighter gauge set (e.g., 10s on electric, 11s on acoustic).
- Action: High action magnifies fatigue. A basic setup can make this chord feel half as hard.
- Pick choice: A medium pick (0.73–0.88 mm) often balances attack and control for rhythm work.
Put it to work: a mini progression
Play two bars of E, two of A, two of E, then two of the V chord built on B, and resolve back to E for four bars. First chorus: open voicings; second chorus: movable shape. Add a light rake into each hit. Listen for the moment the V chord wants to fall home—shape your dynamics so that resolution is your loudest, fullest strum.
The takeaway
You don’t need heroic finger strength or an encyclopedic chord dictionary. You need one solid open grip, one movable shape, a mindful left-hand setup, and a short, structured routine. Ten minutes a day for two weeks will give you a dependable V7 in E that feels and sounds like a pro. Next time a blues in E starts, you won’t brace for the tricky bar—you’ll look forward to it.